banner

Liquid cooler installation

How should a liquid cooler be installed?

Liquid cooler installation

If you’re interested in overclocking your PC, or keeping temperatures low for gaming, or any power demanding operations then a Liquid Cooling system could be perfect for what you’re looking for. As compared to other air coolers, liquid cooling most effectively cools down the high profile computers that require special processing power and cause greater heat. Below is a no-nonsense approach on how to DIY a liquid cooling system and some helpful tips for usage.

Preparing for Installation

However, this can all be avoided and the installation process made a great deal easier if a few preparations are made before plunging in.

Gather Your Components:

Those essential parts include radiator, pump, reservoir, hoses and fittings, coolant, and the mounting brackets. They should fit your PC and be as effective as the cooling you require for your PC.

Choose a Suitable Case:

Liquid cooling is not feasible for all cases therefore make sure your particular case has the room for the radiator and other related parts. Search for evidence for the radiator size that you wish to achieve and always consider airflow with regards this component.

Power Down and Unplug:

As a standard procedure for all installations, switch of any computer on the work, unplug the machine from the wall outlet and ensure that you are well grounded to prevent the transfer of static electricity to the boards.

The installation guide is elaborated below in detail.
Let’s dive into the setup!

Remove the Old Cooler:

If the cooler you are installing is a new one then you have to gently take out the older air cooler from your CPU and the Motherboard. Remove any old thermal paste from the CPU using isopropyl alcohol for a nice area to work with.

Apply Thermal Paste:

The only thing about the tower of the PC is to place a small, thin layer of thermal paste on the CPU. This assure enough conductive heat transfer between the CPU and the cooling block.

Mount the CPU Block:

The liquid cooling block must be placed appropriately on the CPU and then bolted using given mounting screws. Make sure that the socket is firmly in place, but don’t twist the nut too hard because it can crack the CPU.

Install the Pump and Reservoir:

Determine the location in your case to put the pump, as well as the reservoir—often at the bottom of the case. Screw the tubing to connect the reservoir to the pump; make sure all the connections are tight.

Attach the Radiator:

Screw the brackets supplied to securely fixing the radiator to your case. Make they are placed in a correct orientation for airflow, either for intakes or exhausting depending on cooling.

Connect the Tubing:

Connect the tubing on one end to the pump and then the other end to the radiator then to the reservoir. For joining tubing and conduits, use fittings that are compiled according to a comprehensive inventory; make certain that the joints are tight.

Fill with Coolant:

Next, pour coolant to the reservoir gradually while topping up the system while waiting for the air trapped to float. Just tilting the case slightly to release pressure can cause blood to drip from the system and push out air that is trapped.

Connect the Power:

Insert the pump connector into an appropriate power supply port normally a Molex or SATA connection point in your computer case. Take a moment and make sure that the pump switches are connected well to help have steady flow of the coolant.

Leak Test:

Make sure no connection is broken and that there are no leaks when powering, it on. If any are visible, then either tighten of replace them as the case maybe.

Power Up and Monitor:

Just to be sure that the system is cooling properly start up your computer and check CPU temperatures. If temps are significantly lower, congratulations, you’ve now installed your liquid cooling system!

Bonus Tips That Lead to the Best Cooling Environment

To get the most out of your liquid cooling system, here are a few added tips:

Choose the Right Radiator: The radiator is where all the heat is radiated so be sure to choose a radiator which fits your case and cooling solution. Thicker radiators serve more cooling capability but they require larger case and stronger fan.

Invest in Quality

Components: The material used in pumps, tubing and fittings does affect a big difference. Premium parts are more durable, meaning that they are less likely to develop leaks, which makes you the user feel more comfortable and yours cooling equipment more reliable than if it has low-quality parts.

Regular Maintenance: Over time monitor your cooling system. Periodically look for leakage, clean dust off the radiator and fans and replace the coolant every half an year to one year.

Temperature Monitoring: Especially, always use an appropriate hardware monitor to watch the current temperature of the units, CPUs included as well as GPUs and always keep these in the safe zone. Like this, you will notice any disturbances on the way and ensure that your system stays in good shape.

The Bottom Line

The addition of liquid cooling to your PC can work wonders because it dramatically lowers temperatures and fluctuation for peak hardware. By performing these steps, selecting good quality parts and maintaining your setup you will reap the all the advantages of having liquid cooling and having a more efficient and quiet system. Whether you are a gamer or editing videos, or simply if you like this kind of liquid cooling look of your rig, then this is a worthy upgrade for your PC!

banner

Overclocking Your CPU

Overclocking Your CPU: A Beginner's Guide

Overclocking Your CPU: A Beginner's Guide

Any gamer or video editor would tell you that overclocking your CPU can help significantly increase the pace at which your PC runs all sorts of tasks. Overclocking simply means using a higher frequency for a CPU than was manufactured; the benefit of overclocking a CPU is that it offers additional performance, but there are serious pitfalls if done incorrectly, such as phosphorylation or outright damage to the hardware. Below is a how to overclock guide along with some additional tips to help you overclock safely.

Getting Started:

Key Terms to Know
Before jumping in, here are some basic terms that’ll come up in the overclocking process:

Base Clock and Multiplier:

CPU clock is made up of two parts; the base clock that is the basic operational speed and the multiplier which is used to decide how many times this base clock is to be used. These are fine tuned to afford you a chance to alter the performance of your CPU.

Voltage:

The overclock can be higher with increased CPU’s voltage, if it is an option, but you must remember that heat will also be higher. Too much voltage can often be potentially dangerous; that is why mere increments or decrements are made.

Preparing for Overclocking
Getting everything ready beforehand can save you headaches later:

Update Your BIOS:

Ensure that your Motherboard’s BIOS is updated, you’ll find that newer bios, contain better support and stability when it comes to overclocking.

Check Your Cooling System:

Sometimes with overclocking you introduce heat, so a stable cooling system is needed. No matter if you’re running a high-quality air cooler or immersive liquid cooling, make sure your cooler can manage the added load.

Back Up Your BIOS:

This is why it is advisable to copy your BIOS settings in a bid to avoid causing damage. In case of any problem, you have the ability to bring the settings back to normal without stressing yourself.

Here is how you can overclock your computer Step by Step
Okay, now let’s move down to the process of overclocking your central processing unit.

Enter the BIOS:

Shut down your computer and then, at the next startup, quickly press the key that opens the BIOS (it is usually Delete, F2 or F12). This takes you to the control panel of your hardware.

Locate Overclocking Settings:

This means that the options of how you overclock will depend with your motherboard. Search for headings such as “Overclocking” or “CPU Configuration,” or “Frequency/Voltage Control.”

Increase Base Clock or Multiplier Gradually:

Begin with changing either the base clock or the multiplier: a slight adjustment. The recommended step is that the increment should not be more than 0.1 and it is better to increase the clock rate until instability occurs.

Adjust Voltage Cautiously:

If your computer system becomes unstable then you could add a little more voltage to your CPU but be very careful to add only a little at a time. Higher voltage enables the speed control of CPU at higher rates and also produces heat in the same process.

Test for Stability:

Learn more details and apply the stress-testing software like Prime95, or OCCT to determine whether your overclocking is stable. Just to be sure, run the tests for some several hours and one will be certain that the settings will suffice for daily testing.

Definitive Copper Factory on How to Safely Overclock Your CPU for Better Performance

In case you’re interested in improving PC’s performance for gaming, video-related activities or any other process that requires more power, using a CPU overclocking tool will definitely help. You may need to overclock your CPU to run at a higher frequency than the default, thus boosting your system’s performance somewhat at the risk of overloading oroging your CPU. Here is a simple to follow guide on how to overclock, including useful advice on how to overclock with the minimum of hassle and risk.

Getting Started:

Key Terms to Know
Before jumping in, here are some basic terms that’ll come up in the overclocking process:

Base Clock and Multiplier:

The base clock is the CPU frequency at its basic level and the multiplier refers to how much the base clock is to be added to give the desired final speed. These when adjusted allow you to vary CPU’s speed.

Voltage:

In other words, increasing the CPU’s voltage can make the overclocking value greater but remember that more heat results from the higher voltage. This means that control is important as too much voltage poses a risk and so small changes are made.

Preparing for Overclocking
Getting everything ready beforehand can save you headaches later:

Update Your BIOS:

Your motherboard’s BIOS needs to be updated from time to time especially if it supports better overclocking and has better stability.

Check Your Cooling System:

Overclocking may bring heat into the equation, therefore, a sound cooling set up is crucial. That said, all cooling methods from high-end air cooler to liquid cooling should be compatible with your CPU cooler.

Back Up Your BIOS:

As is always the case, it makes a lot of sense to back up your BIOS settings prior to tweaking them. In the event that anything goes wrong, you can easily revert back to the default settings with little or no problem.

The proper method of overclocking When overclocking, it is recommended that you follow a series of steps.
Now that you know its benefits it’s time to explore the process of overclocking your CPU.

Enter the BIOS:

Shut down the computer and turn it on again to enter BIOS which key is commonly Delete, F2 or F12?. This take you to the control panel for your hardware.

Locate Overclocking Settings:

You have to know that these overclocking options may differ depending on your motherboard. Search for words as Overclocking, CPU Configuration or Frequency/Voltage Control.

Increase Base Clock or Multiplier Gradually:

Begin by changing the base clock or the multiplier by small amount’s of frequency. The experienced users usually add no more than 0.1 GHz at a time in order to achieve stability quickly.

Adjust Voltage Cautiously:

If you have instability issues with your system, it is recommended that you up the CPU voltage only by a small amount, though again in small measures. More voltage is used to stabilise the CPU at higher speeds but such comes with the disadvantage of generating more heat.

Test for Stability:

If all the above-described methods are insufficient for determining whether your overclock is stable, use stress-testing software such as Prime95 or OCCT. Several hours of testing ensure the stability of the points – this is a good sign for work throughout the day.

Monitoring and Fine-Tuning
Nonetheless, monitoring a few things after establishing steady settings is important as discussed below.

Temperature:

Monitoring the overall temperature of your CPU is important so make sure you install a monitoring tool such as HWMonitor or Core Temp. Do not operate at a temperature which is higher than the maximum allowed safe temperature which it is about 80°C for most Central Processing Units to prevent hardware damage.

Voltage Levels:

High voltage has implication on the lifespan of your CPU. Use it frequently to prevent damage especially under conditions of stress testing.

Benchmark Performance:

To quantify the overclocking to measure the new increase in performance you can resort to the use of benchmarking tools for instance Cinebench, or 3DMark.

Fine-Tuning:

If you find that your computer is starting to crash, exhibit the blue screen of death, or otherwise behave erratically, throttle the clock speed or voltage down a hair. In its essence, it’s about achieving the highest possible performance at the lowest risk.

Basic Overclocking Guidelines


Overclocking is very fulfilling, but the matter that has been mentioned above will assist in protecting the hardware which we use.

Back Up Important Files:

Firstly, you need to back up the files you have to prevent data loss whereby you find the system unsteady or has developed a foul bug to a crash.

Take Your Time:

Basically, tweaking is not a science as many people have pointed out; instead, it is mostly trial and error. Do not hurry adjustments; it is wise to go slow when making changes to try to avert massive issues.

Watch for Instability:

Overclocking your processor too much can lead to a variety of issues, including system crashes, blue screens, and other odd behaviors – if you are experiencing any of these issues it may be time to scale back on the overclock somewhat lest you fry your processor entirely.

Conclusion of Overclocking Your CPU


You can overclock your CPU, and it will result in a significant uptick in things like gaming, content creation, as well as multitasking. When done appropriately with concern to the various parameters and when done appropriately the overclocking of the system proves to offer numerous advantages. You must always remain patient and careful while dealing with your system to maintain its steadiness as you extract the best processing power out of your CPU!

9445c89b-8c99-473e-95b1-77d5f7683ce8

Recovering Deleted Files: A Step-by-Step Guide

Recovering Deleted Files: A Step-by-Step Guide

Recovering Deleted Files: A Step-by-Step Guide

Again, we all know how that feels: you come across an important file one day and mistakenly delete it the next, and then think that it is gone for good. Thankfully, there are ways of how to get those files back! Today, it is possible to restore missing files if you use appropriate methods and programs. Here is an uncomplicated step-by-step procedure where you can follow when you have erased a file incorrectly, plus few more preventive measures to avoid such incidents in future.

Things to Do As Soon As Possible
The moment you realize you’ve deleted something important, follow these steps to maximize your chances of recovery:

Stop Using the Drive: Do not write to the drive where the file was saved or use it for any other operation that may cause any action on this drive. When files are deleted, the system says that that space is free but in most cases it is still possible to retrieve those files unless new ones are written over them.

Disconnect from the Internet (for network files): If your files are on a shared drive, which was overwritten, or on the cloud storage, which was synced, go offline.

Check Built-in Tools First
But don’t be hasty to go to recovery software right away; check out the existing options in your computer first—it may be that you can solve the problem right away!

Recycle Bin (Windows): Usually the deleted files are temporarily stored in the Recycle Bin, so open it. If you discover your file, context-click on it and choose “Restore”, and it returns to it initial position.

Trash (macOS): Just like Windows, the macOS stores files that have been deleted in the Trash. You just open your Trash bin, locate the file you need and then move it back to the original folder.

Using Data Recovery Software
If the file is not in the Recycle Bin or Trash, then the best way is to use recovery software. There are shareware and freeware applications on the market that can scan the hard drive for files which have been ‘deleted’ but in reality are still may exist physically, waiting to be overwritten.

Paid Software Options: Paid recovery tools are effective and can always include additional features such as scanning intensity, view options and filtering. Some of the most used on the market include Recuva, EaseUS Data Recovery Wizard, and Disk Drill. It allows them to repair files from different kinds of storages and theses programs are intended for more complicated actions.

Free Software Options: Free ones that are tag and taxo can be very efficient in less complicated problems but they are not as equipped as the latter ones. There are two versions: Test Disk for a general data recovery and PhotoRec for Mp3, images and videos etc.

How to Use Data Recovery Software
Here’s a general process for using most recovery software programs:

Download and Install on a Different Drive: When using the recovery software remember to install it on a different drive or in an external media to the one that you are recovering data from to prevent overwriting the erased data. If the deleted file was on the C: store, for example, to store the software in a USB drive or another partition to help drive it.

Scan the Drive: Launch the software and select the drive which the deleted files were stored. Scan starts to look for achievable files to recover. Scans may some time as depending on the size of the drive and intensity or degree of searching.

Preview and Recover: Sometimes, after the scan is done many of the recovery programs enable you to preview the files. After specifying those files that are important, right-click them and then copy to another disk to avoid overwriting other files you wanted to retrieve on the original disk.

Extra Tips for Success

Generally, recovering files that have been permanently deleted or lost hinges primarily on time and the tools used to retrieve them. Let’s enumerate some additional hints to increase your chances of a successful recovery of files:

Time is of the essence: The moment you decide to retrieve your files, the better. This is because, with the passage of time, the “erased” information stored in your OS may be replaced by data that is in active use.

Do Not Format: In the case an individual mistakenly formatted a drive or disk, chances are the drive or disk will not be used at all until recovery measures have been attempted. Formatting a drive or disk creates new file tables which makes recovering previously stored information almost impossible.

Professional Data Recovery: If the information is particularly valuable or if all previous recovery attempts have failed then it might be time to consider a professional data recovery consultant. Such professionals possess special equipment and expertise when it comes to recovering files from damaged hard drives or SSDs and intricate situations.

Avoid Additional Misplacement of Data

It’s one thing to recover files; it’s, however, better to avoid such loss in the first place. Here are a few steps you can take to avoid data loss in the future:

Make Backups: Always remember to make backups of important files into an external hard disk, cloud storage or any other secure location. In this manner, in case you lose a file in the future, you will have a copy to refer to.

Backup Your Files: Google Drive, Dropbox, and iCloud, for example, offer automatic file backup. You can not only have access to your files from anywhere, but worries regarding files being deleted accidentally are also not that much of an issue.

Use File History OR Time Machine: This is a common feature in Windows and Mac Operating Systems that saves versions of files with an option to restore them if they are mistakenly edited or deleted.

Conclusion

The loss of files can be quite annoying, however, with the proper focus, it is generally possible to retrieve them. The above steps, together with rapid response, retrieval technologies and precautions should prepare you for unfortunate dismissals. Remember, though, performing backups regularly is the best defense against the loss of relevant data.

neon-motherboard-background

graphics card installation

Upgrading your computer’s graphics card can greatly enhance its performance, whether you’re a gamer, video editor, or 3D enthusiast. But the installation process may seem daunting. Don’t worry! Our step-by-step guide will walk you through it, ensuring a smooth and successful experience. From gathering the necessary tools to configuring the display, we’ve got you covered. Plus, we provide additional tips like checking compatibility and ensuring proper cooling. So, if you want to unlock the full potential of your computer’s graphics capabilities, read on and learn how to install a new graphics card easily and confidently.

6a6e3225-335c-4b4e-a25b-c9f4c4a35828-2

google search in danger

Recent research has raised concerns about Google’s search quality, revealing that low-quality affiliate marketing content dominates its search results. This means users are bombarded with irrelevant information aimed at generating commissions rather than providing valuable resources. Despite Google’s attempts to tackle the issue through algorithm updates, the constant evolution of search engine optimization tactics poses a significant challenge. Moreover, a patent dispute has led Apple to remove the blood oxygen sensor from its latest Apple Watch models, potentially affecting customers who rely on this feature for health monitoring. Discover more about these intriguing developments and their implications by delving deeper into the article.

banner

AI chatbot recovering accounts

Apple, the tech giant, is set to revolutionize the online landscape by expanding browser options in the European Union. This move comes as a response to regulatory scrutiny and the need to comply with digital market legislation. By providing users with a wider range of browser choices, Apple aims to foster competition and promote a more open digital ecosystem. In another exciting development, Microsoft has unveiled its newest Phi-3.5 AI models, expected to showcase significant improvements in natural language understanding and text generation. YouTube is also taking steps to enhance security with an AI-powered chatbot that assists users in recovering hacked accounts. Discover more about these intriguing advancements!

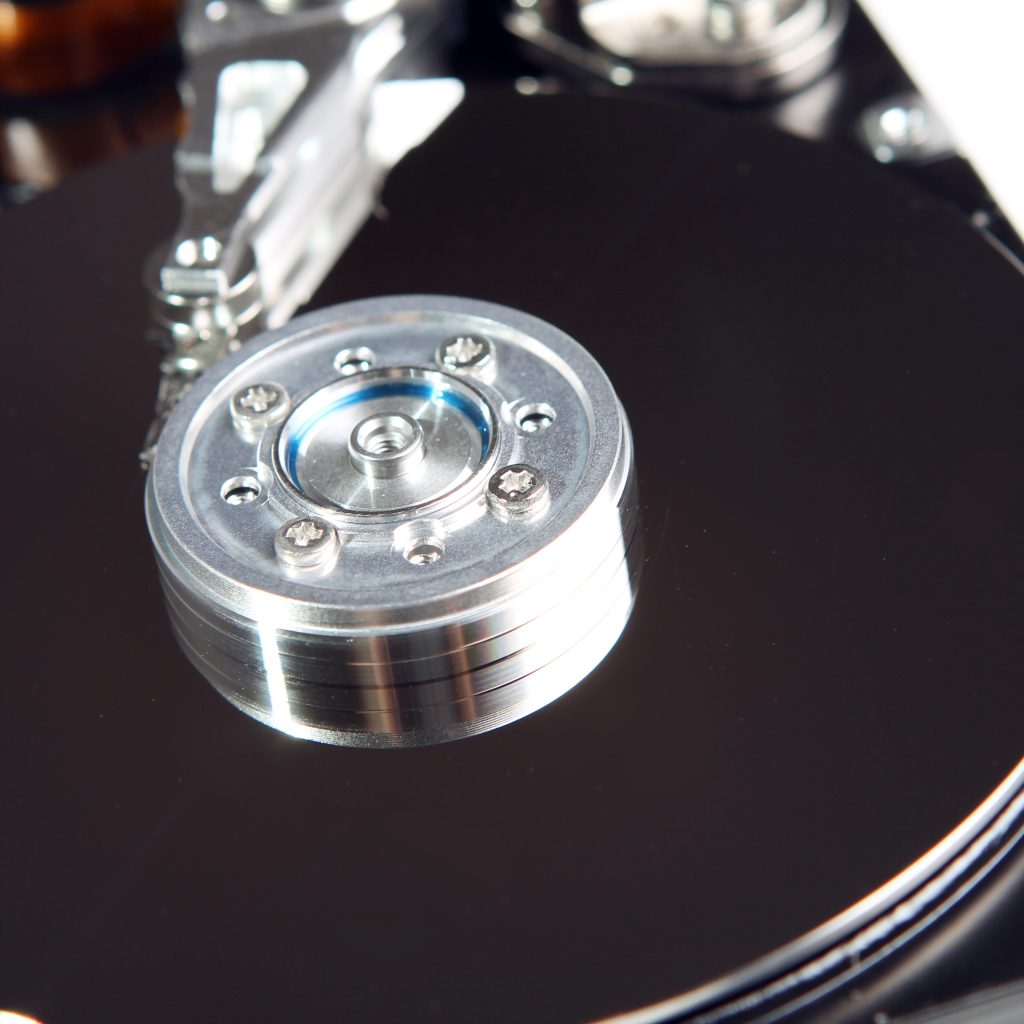
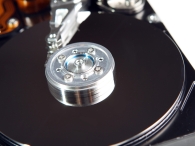
Close up of hard drive disc

harddrive replacement

How to replace harddrive?

harddrive replacement

Why Should You Consider Hard Drive Replacement?

Installing a different drive into your PC will improve its performance. A new hard disk will significantly enhance the computer’s reliability. If your current drive struggles with transfer rates, errors and physical limits, then it definitely needs a replacement.

Prior to Getting Started:

Protect Your Files:

Rationale: There is nothing more disheartening than losing essential data.

How? You can obtain a backup using an external hard drive or space on the Internet o any back up solutions.

Prepare the Necessary Materials:

All the tools you will normally require are a type of Phillips head screwdriver.

Let’s Get Started:

Power Down and Disconnect:

Turn your computer off and unplug its power cord from the wall.

Consult your manual first if you are uncertain how to do this.

Locate the Old Drive:

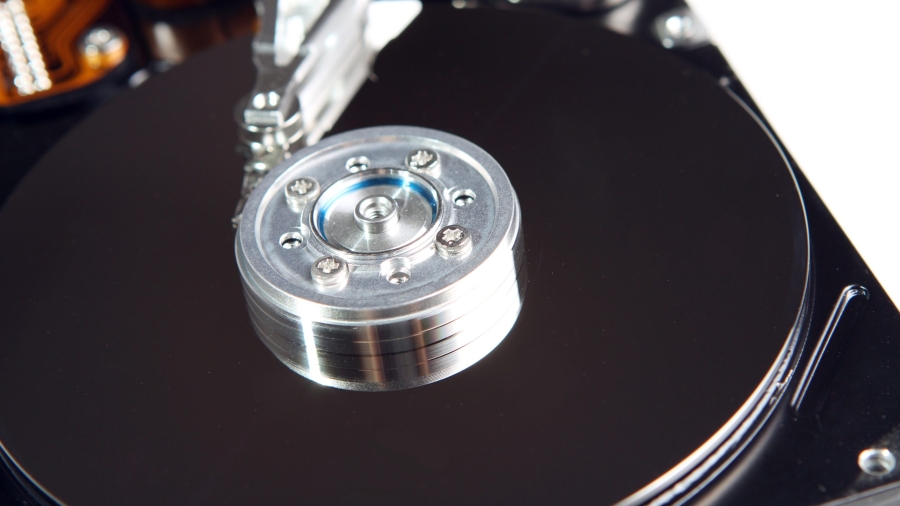
An old hard drive looks like a box with something rectangular inside it and, of course, cables attached to it.

Disconnect the Cables:

Unplug the power and data cables from the old drive.

Remove the Old Drive:

Take the screws off and pull the drive out of the bay.

Install the New Drive:

Insert the drive and secure it with screws so it doesn’t move.

Thereafter, connect the power and data cables.

Close Up:

Replace the cover of the computer case and put screws back on.

Mid Level Mac Tutorial:

Recovery Mac Mac

Plug it back in and power it up.

It is normal for the computer to detect the new drive and ask for initialization credit to the drive.

There are programs that allow the transfer of your data , use copy paste or transfer via definition.

Some Helpful Advice:

Be Gentle :

Remember not to knock or drop the drive.

Wrist strap reducing wave Static – A protective static free wrist strap may be useful in protecting the drive.

Don’t Feel Abash – If there’s something you didn’t do or aren’ t sure if you need to do it, consult someone.

If this procedure is followed in the right manner, your machine will never be as slow again. Good luck in the upgrade.

Gaming PC

Now you can build your own gaming pc

Gaming PC

Coloring Outside the Lines When Building a Personal Computer: The Ultimate Beginner’s Handbook.

What are the Advantages of Custom Building a PC?

Over-clocking and tinkering with a built PC is akin to customizing a motorcycle or a hot rod – it provides a sense of uniqueness and ownership which is exemplary. One gets to handpick every component starting from the best designed casing to the fastest gpu. Moreover, the cost is much lower than if a pre-assembled desktop were to be ordered.

Step 1: Building Your Desktop Computer

Identify Your Purposes: What activities do you engage in? Are you a general computer user, a gamer or a video editor? This will also affect the components you use.

Determine How Much Money You Will Spend: Try to limit your spending. Find out the prices of components so that you do not go overboard.

Choose An Appealing Case: The case of your PC is the reflection of the identity of your PC. Choose a case which has sufficient space for the PC components you have.

Step 2: Collect the Necessary Parts

The Mind: The CPU (Central Processing Unit) is the main component in your personal computer. Intel and AMD are basically the two key competitors.

The Motherboard: This is the place where everything connects together. Make sure it’s suitable for the CPU and the other additional parts.

Storage: RAM (Random Access Memory) is often referred to as the and long term memory of your Windows OS. More RAM allows more applications to run simultaneously without a dip in performance.

Storage: Select proper HDD (Hard Disk Drive) – a lot of gigabytes for storage or the ultra-fast SSD (Solid State Drive) – for fast start.
Graphics Card: For a gaming or video editing savvy, having a powerful GPU is compulsory, than any other component of the computer.
Power Supply: Powder supplies also need to be selected carefully to sort out the power requirements of the components.
Step 3: Prepare Your Workspace

Clean Up: To make your employees happy, then it is important to maintain a clean work environment.
Gather Your Tools: You will need a screwdriver, cable ties and a thermal compound, as well as an anti-static wrist strap.

Step 4: Assemble Your Rig

Install the CPU: Properly align the CPU and then fitting it onto the motherboard, and also, fixing it in place.
Mount the Motherboard: Bolt the Motherboard to the case.
Add RAM: Insert the RAM modules into the appropriate slots of the motherboard.
Connect Storage: Screw your HDDs or SSDs to the motherboard operation.
Install the GPU: Now place the PCIe slot and put the GPU into its respective position.
Cable Management: Join the power supplied wires to any of the components.
Step 5: Install the Operating System

Boot from Your Installation Media: Instead, use a USB drive or DVD with the operating system of your choosing (it could be Windows or Linux).
Follow the On-Screen Instructions: It’s pretty straightforward.

So there you have it: the process of building a PC from the ground up browse through our gallery to see what components other people have put together for their custom computers.

Now, you’ve got yourself a specially designed computer that performs tasks to your preference. Happy with your new rig and powers and flexibility of it.

A Few Tips:

Do Your Research: Read about parts and how they work and whether or not they are up for working together.
Watch Tutorials: Of course, for typical publishability, there are numerous detailed tutorials available.
Don’t Be Afraid to Ask for Help: Use technology forums or discuss your problem with friends that know how to deal with such issues.
Have Fun!: Thus, assembling a PC yourself is always a great idea.
Just always remember that PC building is still a continuously growing world. Learn about the current fashion and technologies to see for your rig to be up to date.


neon-motherboard-background

graphics card installation

Upgrading your computer’s graphics card can greatly enhance its performance, whether you’re a gamer, video editor, or 3D enthusiast. But the installation process may seem daunting. Don’t worry! Our step-by-step guide will walk you through it, ensuring a smooth and successful experience. From gathering the necessary tools to configuring the display, we’ve got you covered. Plus, we provide additional tips like checking compatibility and ensuring proper cooling. So, if you want to unlock the full potential of your computer’s graphics capabilities, read on and learn how to install a new graphics card easily and confidently.

banner

VR AR

The Convergence of VR and AR: Crafting Immersive Metaverse Experiences

man wearing vr headset and touching laser things

Picture yourself living in a completely new world, in a world of objects with which you could even communicate. And that is the beauty of the Virtual Reality (VR) and Augmented Reality (AR).

VR: Your Digital Playground

VR is when you wear what can be described as a helmet that takes your mind to another world. You might get a chance to explore the unknown territories, defeat dragons or, simply, have your conferences and business meetings staying at home comfortably.

AR: Enhancing Your Reality

AR is very similar to putting a layer of computer-generated reality over reality, or simply – in the digital layer. Some of the things you can do for example is use your phone, or special glasses that enable you to see information, directions, or even people in the real world.

The Perfect Pair: VR + AR

As we can see, combined with VR and AR, we create the unlimited field. Think it is easier to play VR game, where you can use your real hands to pick up actual objects on the screen. Or joining an online conference where you are aware of other participants and can communicate with them in the same way as if all of you are in the hall.

The metaverse as a collective virtual environment for interacting is a common trend of the future. The consistent implementation of immersive power from VR and the augmentation feature of AR already makes us stand in the threshold of a new generation of digital experience.

Key Applications of VR and AR in the Metaverse

man wearing vr headset and touching laser things

  • Virtual Reality (VR) and Augmented Reality (AR) technologies are completely revolutionizing how we go about our lives, engaging in productive work, and having our leisure time. Let’s dive into some exciting ways these technologies are shaping our future:

    Socialization in a New Dimension

    Virtual Hangouts: Think of the possibilities of being able to attend a coffee shop meet up with friends or even watch a concert together even if the buddies are from different counties or even worlds away.
    Family Fun: By using VR individuals and families particularly can play games or go out on virtual adventures without necessarily being physically present with one another.
    Gaming, Reimagined

    Immersive Gaming: VR makes the player to be inside the game by actually wanting to be a part of it.
    AR Gaming: AR will allow turning your living room into a battle or a magical one, turning the physical and the virtual environments into one.
    Learning, Evolved

    Virtual Field Trips: You can sponsor a trip to Antiquity, an alien planet, or the bottom of the sea and all this in your classroom.
    Hands-on Learning: It would be possible to add perceived values with AR, for example, enhance the interest of the students by making the textbooks lively.
    Training and Simulation

    Safe and Effective Training: Training of uses such as pilots, surgeons and other personnel who perform hazardous activities can be effectively administered through the VR and AR settings.
    Skill Development: Gain experience with no negative outcomes, so your errors cannot harm others or damage the company.
    Designing the Future

    Visualizing Ideas: These technologies can prove particularly useful to designers and architects as they can get a view of the virtual creation before it is physically put to construct.
    Prototyping: Make an iterative forecasts before going over designs from an architectural point of view in the real world.
    But with the growth of VR and AR, there is much more to come in terms of innovation and spectacular usage. They capable of dramatically transforming how we engage with the environment and other people.

Thus, let us discuss the disadvantages of two rapidly developing forms of interactive media: virtual reality and augmented reality.

The Challenges

Tech Headaches: Making FAKE REAL! experiences is not necessarily an easy job and for that the right gear is needed.
Hardware Limitations: In some cases though, our machines themselves are not capable of providing enough power for VR and AR.
The Bright Side

Nevertheless, the future of VR and AR specifically looks very bright. Imagine:

Social Revolutions: Communicating with close ones and even other people that are half a world away, as if you are sitting in the same room.
Educational Breakthroughs: Education through gamification, such as travelling back in time to prehistoric times and early cultures or by running a simulated experiment.
Entertainment Redefined: Games, movies and concerts realized to a completely new level of experience.
Economic Opportunities: New opportunities and sectors coming about due to VR and AR technologies maturation.
With the advance in technology, one can easily forecast that there are far more sophisticated aspects of the VR and AR still to emerge into the market. Even in the future, the metaverse is going to be popular since people feel comfortable using it as a tool.

The Future of VR and AR in the Metaverse

future of vr

This is just the start of it, with VR and AR stepping onto the scene. Ever since technology is becoming more intelligent the artificial revolution is just around the corner. Imagine a future where:

AI Powers the Metaverse: AI will improve the realism of the virtual worlds and make them reach for true-life in terms of interaction.
Blockchain Secures the Digital Realm: The use of block chain technology will guarantee security and ownership of assets within the metaverse.
Adding the VR, AR, AI, blockchain will make the digital world fully interactive and integrated. It’s not just about gaming and entertainment via films or videos; it’s about living among others, working in another world and having friends and relations in a virtual environment as tangible as tangible reality.

At the same time, the possibilities of the metaverse are enormous, given that the market is just beginning to develop. These technologies are still in their early phase and this means if we are to look a few years down the line there exists more mind-blowing ramifications of such technologies than can be imagined bearing in mind their impacts on how societies live, work and have fun.